Translate

Sunday 14 December 2014

Tamaki's way : Dressed up your character !

HELLO EVERYONE !!!
Omg i dunno how long I have not updated this blog......I was very busy with a solid class schedule , so , forgive me~~٩(⌯꒦ິ̆ᵔ꒦ິ)۶ᵒᵐᵍᵎᵎᵎ

Okay! Just this time I will give you a tutorial make-colored clothing~
we will use the base body of the
previous post


create a new layer above the "body layer" to create sketches for clothes.
(you can create and design the clothes for your character according to your own taste and imagination (●・ω・●)/)


you get the sketch for cloth's base !
*★*―чёs♪d(`・c_,・´)bчёs♪―*★*


we will work on the top of the shirt (b゚_○゚) then, we can close the layer "basic body" for a while in order to focus.
select a basic color of clothing that you want and paint like block all parts of clothing.
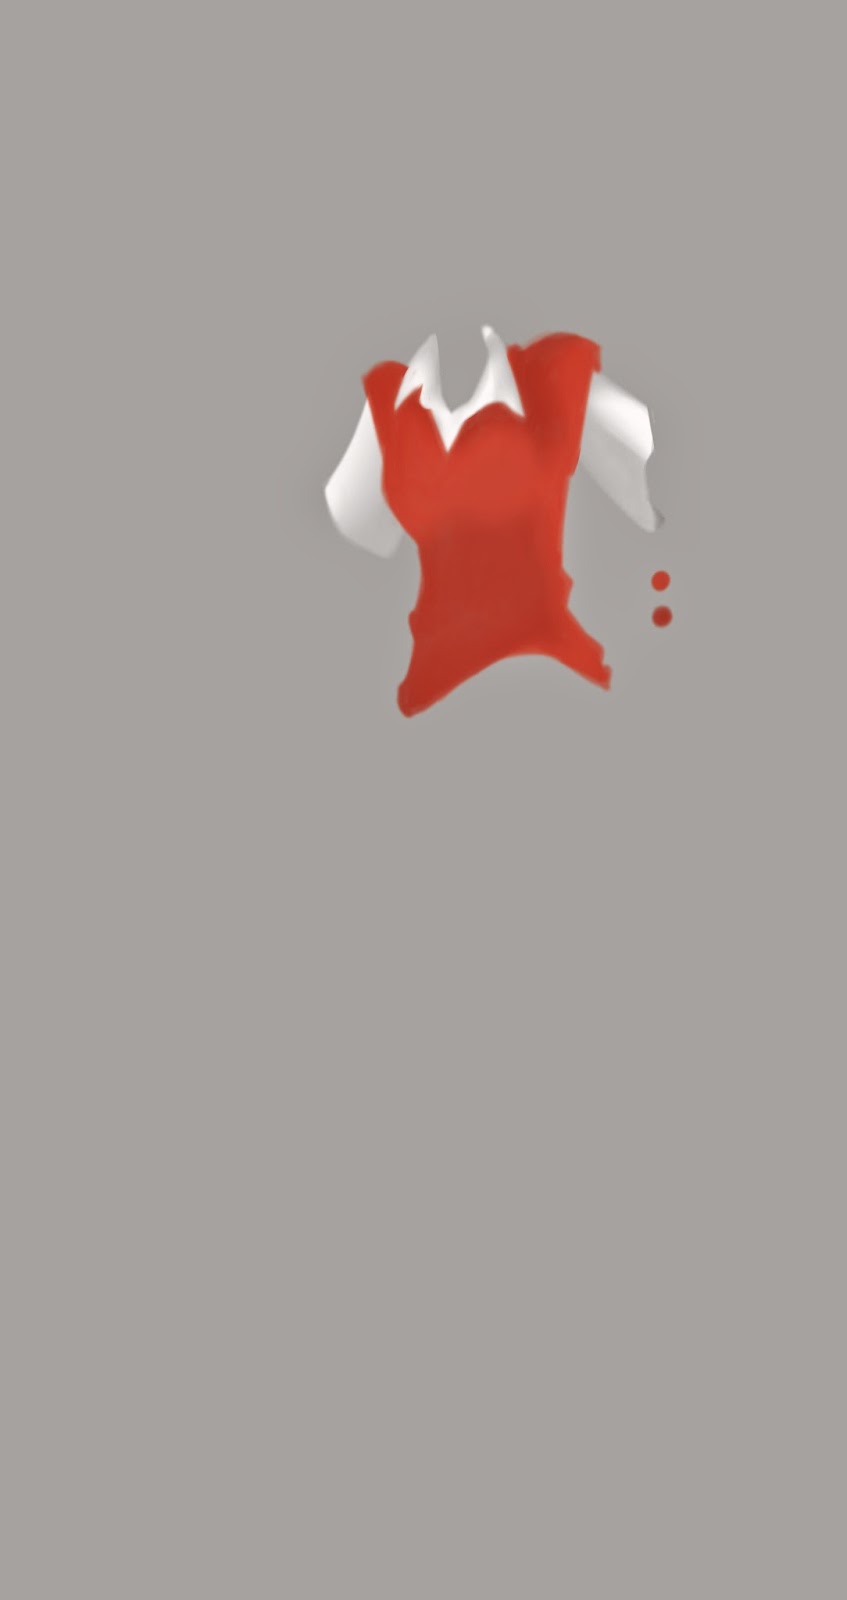
I love Red-color so much ❤ , so....I will color this dress in red, the base color I used was a little orange red color.


select the color a bit closer than the base color (dark orange) to red on the color palette to get a more concentrated red color.
(the direction of the light coming from the left, then I will make a block for a shadow on the left)


then , blend it well


repeat the previous steps to take on a more intense red color.
create a block to use the color shading shadow. section falls the shadow is at the opposite to the direction of the incident light (don't forget the part of the curve of clothes)


blend it well


how? satisfied with the results?
but wait, we are still able to get a more satisfactory result with light effects~ o(●´ω`●)oわくわく♪
choose a light color from the first base color you choose.
remember, don't use white color to give the effect of light!! because would make it look less natural.

color block in the direction of light, and in the curve that stand out


blend it well , and you get ( ´艸`)


put some detail
and you get the final result (★ゝω・)b゚・:*:・Congratulations・:*:・゚


(★’ω’)ノ*+:。.。:+*THANK YOU FOR READING*+:。.。:+*ヽ(‘ω’☆)
don't forget to visit my Facebook Page and Deviantart
also comment and rate in this post


I will give the final result of my pictures , dpn't forget to show me yout result too ヾ(ゝω・`)o
see you again!(*ゝェ・)/~☆Bye-Bye♪

with extra full of love,

tamakiBaka


Monday 20 October 2014

Tamaki's way : make the whole female body frame (with pose)

Helo everyone~! I was very busy with the crowded class schedules , so I can update some post 。゚(゚ノД`゚)゚。
Honestly, I've made the material for this tutorial from a few weeks ago but I haven'tt had time for blogging.

Basic to the next tutorial is one of the original charcter I made when I was in junior high school. I did some changes of course, followed by a picture of my current style.(´ω`★)


Let's start with no strings attached ლ(́◉◞౪◟◉‵ლ) leeel~~


create a chart upside down triangle to the base of the top (from shoulder to waist).

create a line or a point on the central axis to the boundary line of the bottom of the chest


create a new triangle from the midpoint of the axes of the chest. made a little wider.


draw a line for hands and feet (for free poses as you like) 
Don't forget to draw a circle for the joints.


draw the head and the palms of the hands and feet.


and now draw the lining for the body. ♡(.◜ω◝.)
remember, doon't get too hung up on the shape of a flat plane that we use to sketch, because just going to make your drawings look stiff 
* I changed into a basic framework to simplify the blue line I drew sketches
**get used to working with "new layer" at each step to tidy up of your work.


then, remove the sketch layer basic framework
yaay~ we get the body !! (人´∀`*)


But wait, don't be satisfied ! Our work is just beginning.
Draw a smooth curve on each joint to make your images look more natural.


previous sketch layer off and we get the result “ψ(`∇´)ψ
Simple and easy, right?


Thank you for reading !! 
Don't forget to leave a comment and please share, or press the "google +" icon to share or more at the bottom of this post to appreciate this post.


See you in the next post 


with love ;
TamakiBaka

Saturday 4 October 2014

Tamaki's ways : Ao Haru Ride - Futaba's eyes


Yahoo !! I'm back with new post ≧◔◡◔≦
This time , I'm in love with an anime series adapted from the manga of the same title is "Ao Haru Ride", anyone watch the anime or read the manga?
I watched the anime series first before reading the manga series. The first time I watched I immediately fell in love at the sight of the eyes of the female characters, they look very pretty and adorable.

so, I am trying to make that "beautiful eyes" heheeee~
The steps are very easy, and I add some details according to my taste (it's optimal to you to follow the part that I add it or not)

This is an example of Futaba's eyes that I took with printscreen while watching anime


nah , let's start ♥(ˆ⌣ˆԅ)

first , draw for top and bottom line of the eye (I'm very weak in drawing a line, just ignore the messy lol)


make the eye ball~


the colors we need for Futaba's eyes


use color no.1 to make a smaller circle d in the black circle.


then, use the color no.2 to fill half of the circle before we make (made ​​to resemble a crescent moon)


use color no.3 to create a circular line in eyeball


Blend a little (make sure the blend tool oppacity mix is a little bit, because the "opacity mix" that is too large will eliminate the line that you created)


*optimal step : I added a color slightly darker brown to the top to make the dimensions (if you want the exact same color as in the anime, you can skip this step)*


make a small circle in the middle of the pupil of the eye. you can use the color black (as in the anime), I use dark chocolate.


belnd or bkur the small circle


add white behind the eyeballs. 
this is optimal, but I've added a number of lines eyelashes to look thicker and beautiful, you can skip this step if you don't like.(>‿◠)✌


*optimal step , you can skip this step and go directly to the last step*
add black on the 1/3 of white eyes, then blend using the "blend tool" or blur tool "


*after blend/blur :


Finally, figure 2 pieces large and small circles colored white for light reflection.


and.....You get the final result (っ-●益●)っ ,︵‿ ♥


very simple and easy , ya ? ≧✯◡✯≦
If you try and succeed, you can show it to me in facebook , tag my facebook TamakiBaka - fb page
Thank you for reading !! 
Don't forget to leave a comment and please share this post by pressing one of the buttons that are on the bottom of this post you liked my post ✿◕ ‿ ◕✿

my Futaba's fan art final result 
ヽ(´ー`)人(´∇`)人(`Д´)ノ


See you in the next post 


with love ;
TamakiBaka


Thursday 25 September 2014

Tamaki's way : Pencil lining to digital sketch

hi everyone !!
Some of my friends say is rather difficult to make sketches for coloring digital without using pen tablet. Yes, some friends do like digital coloring but don't have a pen tablet, they use the mouse. 
Sometimes, having a pen tablet but prefer to make a scratch on paper using a pencil (for example, me)

then, this time I will give a very easy step for inputting your sketches neatly into a digital file. 
very very easy way :D 

let's start

1. First, make a pencil sketch on a piece of paper. This's a pencil sketch of mine
*I don't know any of the people who read my blog, then I will for the sake of comfort with "securing" my pictures .. hehehe*


2. Then, scan your images using a scanner.
I would use adobe photoshop for this step. So , open your photoshop ;)

my scan results :


3.  Open your image file. See the box "layers", point your pointer toward the symbol "padlock" on the layer, hold and drag the icon to the direction of "trash" on the lower end.


4. Then , select the color range to clean up the sketch


5. Directing the "eye-drop tool" towards the sketches that will be removed , then point up to a maximum fuzziness. Click OK


6. After that will appear dotted lines that surround your sketch line. 
Press the "delete" on the keyboard, the white color in your sketch scan results will disappear and leave you only the sketch lines. 
press "ctrl + D" to remove the marking on your line.

the result will be like this :3


7.  Right click on the layer and select option "flatten image"


you'll get the result :


8. lighting set the image using the "brightness and contrast" setting.


reduce light to a minimum. repeat this step until you feel the line density is in accordance with what you want.


9. Aaaaaaaand , you get your final result xDD


*PS : If you want a line without a white background (for ease when coloring by putting line on the top layer), you just need to pass step no.7 (flatten image)


You can see the final result of this pic coloring here


Thank you for reading !! 
Don't forget to leave a comment and give me rate bellow~ :3
See you in the next post 

with love,
TamakiBaka